Maintaining polished floorboards can be a challenging task, especially when faced with scratches, dents, stains, or other forms of damage. However, with the right knowledge, tools, and techniques, repairing polished floorboards can be a rewarding and achievable task.
In this blog post, we will provide you with advice and step-by-step instructions on how to assess and repair different types of damage to your floor polishing Geelong-wide. Whether you are a DIY enthusiast or considering professional help, these tips and tricks will help you restore the beauty and functionality of your floorboards. So, let’s get started and learn how to restore the beauty of your polished floorboards!
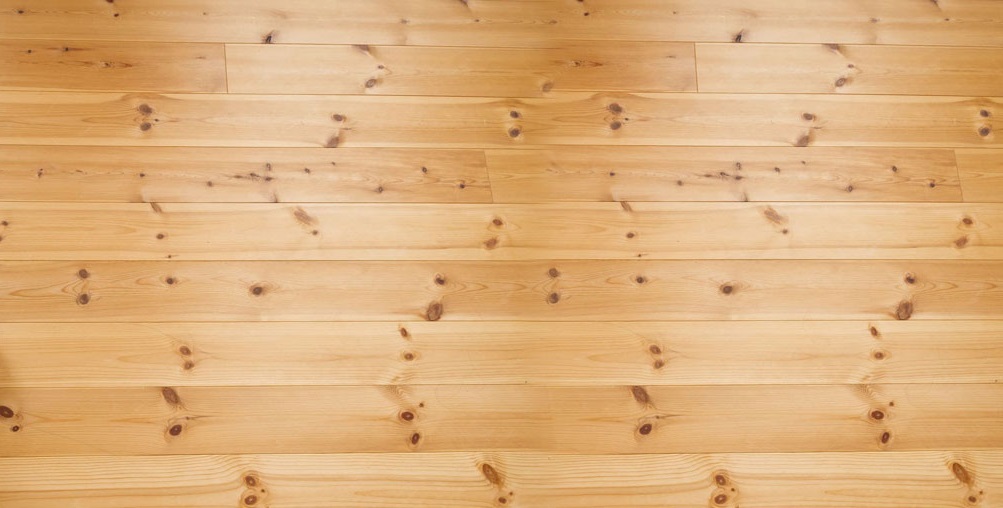
I. Understanding Polished Floorboards
Polished floorboards have become a popular choice for homeowners due to their aesthetic appeal and durability. These boards are essentially wooden planks that are sanded down and sealed with a protective coating, such as varnish or wax, to create a smooth and glossy finish. Their natural and warm appearance adds a touch of elegance to any space.
One of the significant advantages of floor polishing Geelong for the floor is its longevity. With proper care and maintenance, they can last for decades, making them a worthwhile investment. Additionally, polished floorboards are relatively easy to clean and maintain, making them an ideal choice for high-traffic areas in your home.
However, it is essential to understand that polished floorboards require regular maintenance to preserve their appearance. Over time, these boards can develop scratches, dents, or even water damage. But don’t worry, we’ve got you covered with our tips and tricks to repair these issues and bring back the shine to your floorboards.
II. Identifying Common Floorboard Issues
Before we jump into the repair process, let’s take a closer look at some common problems that can occur with polished floorboards. By identifying these issues, you’ll be better equipped to tackle them effectively.
1. Scratches: Over time, everyday wear and tear can result in minor scratches on your polished floorboards. These scratches can be caused by furniture movements, pet claws, or even high heels. While they may seem inevitable, they can be easily repaired with the right techniques.
2. Dents: Heavy objects dropped onto the floor or furniture with sharp edges can leave dents in your polished floorboards. These dents can be unsightly and affect the overall appearance of your floors. Luckily, there are methods to remove or minimise the appearance of these dents.
3. Water Damage: Accidental spills or leaks can lead to water damage on your polished floorboards. If left unattended, water damage can cause the boards to warp or even rot. It is crucial to address water damage promptly to prevent further deterioration.
Now that we have a better understanding of the common issues that can arise with polished floorboards, let’s move on to the tools and materials, you’ll need to repair them.
III. Tools and Materials Needed
To successfully repair your polished floorboards, you will need a set of essential tools and materials. Here are some of the tools commonly used for repairing polished floorboards:
1. Sandpaper: Various sandpaper grits are essential at different repair stages, starting with surface preparation and continuing through sanding and refinishing for a comprehensive polished floorboard restoration.
2. Wood filler: To conceal scratches, dents, or gaps in floorboards, select a wood filler that closely matches your floorboard’s colour. This ensures a flawless, inconspicuous repair, blending seamlessly with the existing wood surface.
3. Finish remover: Before restoring or refinishing floorboards, removing the existing finish is vital. A specialised finish remover breaks down old coatings, ensuring a smooth, durable result in subsequent repairs, staining, or refinishing.
4. Stain remover: To tackle various stains effectively, it’s crucial to match the right stain remover or create a homemade solution tailored to the specific type of discolouration you’re dealing with.
5. Protective gear: It’s crucial to prioritise safety during the repair process. Protective gear such as gloves, goggles, and a dust mask should be worn to protect yourself from potential hazards.
When selecting materials, consider the type of damage and the specific floorboard material. Different types of wood may require different approaches to repairs. It’s always recommended to consult with an expert or research the best materials for your specific floorboards.

IV. Step-by-step Repair Process
Now that we have our tools ready let’s dive into the step-by-step repair process for polished floorboards. Remember to take your time and follow each step carefully for the best results.
1. Assessing the Damage:
Start by assessing the damage on your polished floorboards. Determine the extent of the scratches, dents, or water damage. If you’re unsure or dealing with significant damage, it may be best to consult a professional who specialises in floorboard repairs.
2. Preparing the Area:
Before commencing repairs, ensure the removal of any furniture or objects that might impede your work. Clearing the area will grant you sufficient room to manoeuvre and carry out the necessary repairs unhindered.
3. Fixing Scratches:
For minor scratches, you can use wood fillers or wax. Start by cleaning the scratched area and then apply the wood filler or wax according to the product instructions. Allow it to dry and then sand it down until it’s smooth. Finish off by applying a fresh coat of varnish or wax to blend it with the surrounding polished floorboards.
4. Addressing Dents:
Dents in wooden floorboards can be frustrating, but they can be repaired using various techniques. One effective method is steaming the dented area. Place a moist cloth or towel over the dent and use a steamer to apply heat. The steam will help the wood fibres expand, gradually restoring the original shape. Alternatively, you can use an iron by placing a damp cloth over the dent and applying heat with the iron. Be cautious not to burn the cloth or overheat the area. Once the dent is removed, sand the area and refinish it to match the surrounding floorboards.
5. Dealing with Water Damage:
Water damage can be a more challenging issue to tackle, as it can lead to structural damage if left unaddressed. Start by drying out the moisture using fans or dehumidifiers. If the water damage is severe, it may be necessary to remove and replace the affected floorboards. Once the area is dry, sand it down, and refinish it to restore its original appearance.
6. Sanding and Refinishing:
After addressing the specific issues, sanding down the repaired areas is crucial to ensure a smooth and uniform finish. Begin by sanding the damaged sections with fine-grit sandpaper, gradually transitioning to finer grits. This will help remove any imperfections and prepare the surface for refinishing. Once the damaged areas are sanded down, apply a fresh coat of varnish or wax to restore the shine and protect the floorboards.
V. Preventative Maintenance Tips
Repairing your polished floorboards is just the beginning. To ensure their longevity and keep them looking their best, it’s essential to follow some preventative maintenance tips. Here are a few recommendations to help you maintain the condition of your polished floorboards:
1. Regular Cleaning: Regularly sweeping or vacuuming your floorboards removes dirt and debris, safeguarding the finish from scratches and maintaining the floor’s appearance and durability. Preventing surface damage is essential.
2. Use Protective Mats: Place mats or rugs at entryways to trap dirt and prevent it from scratching the floorboards. Additionally, employ furniture pads to deter any scratches that may result from furniture shifting.
3. Avoid Excessive Moisture Exposure: Swiftly address spills to prevent water damage. Monitor moisture in damp-prone areas like bathrooms and kitchens. Excess moisture harms surfaces, leads to costly repairs, and poses health risks.
4. Schedule Professional Maintenance: Consider having your polished floorboards professionally cleaned and refinished every few years to maintain their appearance and protect them from wear and tear.
IV. Final Thoughts
In this blog post, we have provided you with advice and step-by-step instructions on how to assess and repair different types of damage to your polished floorboards. By following these tips and tricks for floor polishing Geelong you can restore the beauty and functionality of your floorboards.
Remember, repairing polished floorboards is achievable with the right knowledge and tools. Whether you choose to tackle minor repairs yourself or seek professional assistance for more significant damage, it’s essential to prioritise safety and follow the recommended techniques.
So why wait? Discover the best-kept secrets for polished floorboard repair. Trust Timber Floor Polishing Melbourne for expert guidance and flawless results. Contact us today to transform your floors.
