Sanding and refinishing wooden floors can bring back the beauty of your floors even if you have used them for years. Over time, scratches and marks can appear, fading away the shine that hardwood floors bring to a room. The damage depends on the type of protective coating used and how often the floors are used.
If you’re curious about how floor sanding Melbourne can transform your floors and even increase your home’s value, keep reading! We’ll break down the wood floor sanding process in simple steps and help you restore the timeless charm of your floors.
Step-by-Step Process to Sand Timber Floors
Homeowners usually rely on floor sanding professionals to get the desired results. However, DIY is also a good idea. But it is much more than just running the sanding machine over your floors.
Let’s take an in-depth look at the floor sanding process:
Gather the Essentials
Floor sanding is often a time-consuming process. And for high-quality results, you will need high-quality tools. Here are some standard tools you will need:
- Drum or orbital sander (Buy or rent one from a nearby home improvement shop)
- Different sandpaper grits (e.g., 36, 60, 80, and 100)
- Vacuum cleaner
- Safety essentials (dust mask, safety glasses, ear protection)
- Plastic sheets (to protect furniture from dust)
- Wood filler
- Paintbrush
- Wood stain or finish
Prepare the Floors
Preparation is key when sanding timber floors. So, firstly remove all the furniture and rugs from the room. Then, sweep and vacuum your floors thoroughly to ensure the flooring is clean enough to start the process.
Once the floors are clean, inspect for any protruding nails. Remove or hammer them down to ensure an even surface that doesn’t damage the floor sander. Also, take out the old finish applied on the floor. This will make the sanding process quicker and smoother.
Now, protect the doorways and vents with plastic sheets so that the dust doesn’t get spread in the home.

Choose the Perfect Sander
Here, you need to make the right choice for your floors. Primarily, there are two kinds of sanders available: drum sanders and orbital sanders. Each sander has its own benefits and use cases. Here are some points that will help you make an informed choice:
Drum Sander:
- Ideal for heavy-duty sanding tasks.
- Removes a significant amount of material quickly.
- Best suited for large, flat areas.
- Requires more skill to operate effectively.
- It may leave behind noticeable drum marks if not used properly.
Orbital Sander:
- Perfect for light to medium sanding jobs.
- Provides a smoother finish compared to drum sanders.
- Great for detailed work and reaching tight spaces.
- It is easy to control, making it suitable for DIYers.
- Works well for refinishing hardwood floors with minimal risk of damage.
Based on your floor condition, project size, and DIY skills, you can select the ideal sander machine for your beloved floors.
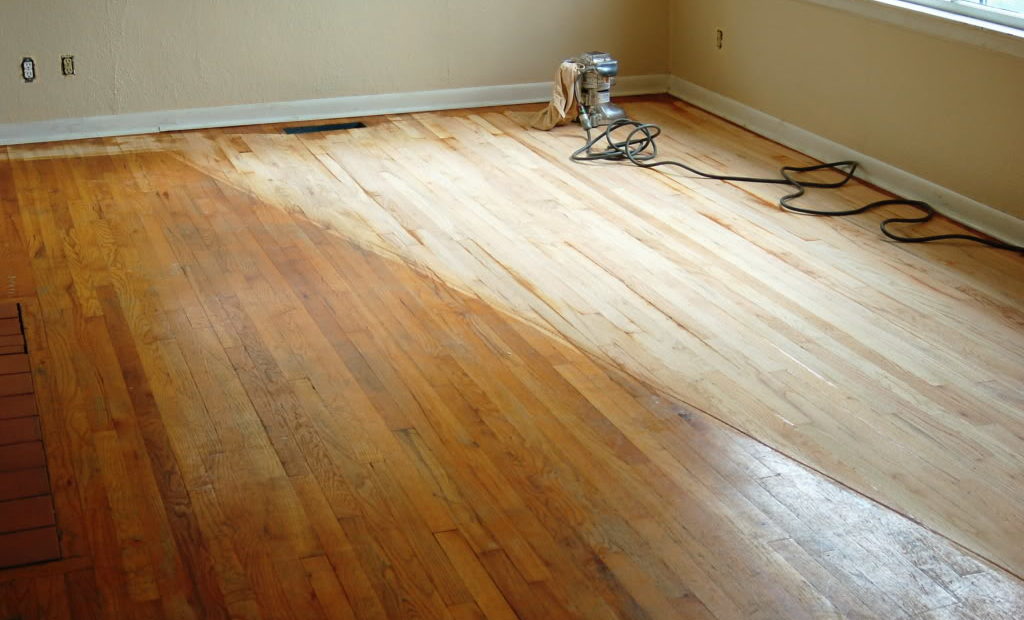
Begin Sanding
To start sanding, use the coarsest sandpaper you have and go slow. Check the sandpaper constantly to ensure it’s not worn out and you’re sanding evenly. Begin sanding from the middle of the room, moving the sander smoothly along the wood grain.
After each sanding stage, use a vacuum cleaner to remove all the dust. This keeps the surface clean for the next sanding round and reduces the risk of breathing in dust, making your work area safer.
Repeat the Process with Finer Grits
After the initial sanding rounds with lower grit sandpapers, move forward with progressively finer grits such as 60, 80, and 100 grit.
Also, don’t forget to vacuum the floors after each sanding step. It will provide you with a smooth floor surface for staining and sealing.
Find Gaps and Fill Them
Once you are done with sanding your floorboards, look out for gaps and holes. If found, repair these imperfections with a wood filler. Let the filler dry for some time.
Sand the area lightly after the filler has dried completely. It will help you ensure an even floor surface.
Apply Your Finish
Lastly, you have to apply your finish or stain. Depending on your floor type and desired finish, you can choose from a range of finishes like natural oils, modified oils, varnish, and water- or oil-based polyurethanes.
To apply the finish evenly, use a paintbrush along with following the wood grain. Also, read the manufacturer’s guidelines to use the finish effectively and know the drying time.
Once the initial coating has dried, buff the floors with a dedicated buffing machine. It will prepare your floors for the next round of finishes. Usually, three layers of finishes are applied to achieve a satisfactory look and shine.
Bonus Tips for Floor Sanding
While the entire floor sanding process is covered in the above steps, there are still some things you can know only with experience. But don’t worry, we will make it easy for you.
Just keep the following things in mind when sanding timber floors:
Work in sections: Instead of sanding the entire floor at once, work in smaller sections. This allows you to focus on one area at a time, ensuring thorough sanding and preventing the sander from overheating.
Use a vacuum attachment: Attach a vacuum to your sander to collect dust as you work. This not only keeps your work area cleaner but also helps prevent fine dust from settling back onto the floor after sanding.
Sand at an angle: Instead of sanding parallel to the wood grain, try sanding at a slight angle (about 15-30 degrees). This can help to remove any cross-grain scratches left by previous sanding passes, resulting in a smoother finish.
Moisture test: Before sanding, check the moisture content of the wood using a moisture meter. Sanding wood with high moisture content can lead to problems like cupping or warping. If the moisture content is too high, wait until the wood has dried to an acceptable level before sanding.
Protect adjacent areas: Cover adjacent surfaces, such as walls and baseboards, with painter’s tape to protect them from accidental scratches or damage during the sanding process.
Take breaks to inspect: Periodically stop sanding to inspect your progress. This will help you identify any areas that may need additional attention or adjustment in technique before moving on to the next section.
Use a conditioning oil: Consider applying a conditioning oil to the wood after sanding and before applying the final finish. Conditioning oils penetrate the wood, nourishing and protecting it from within, and can enhance the natural beauty of the wood grain.
The wood floor sanding process is not a small task, but even the most novice homeowners can manage it with proper tools and guidance. You just need to be prepared, spare some time, and be confident about your skills.
By regularly sanding the floors, you can keep up the appearance with minimal maintenance expenses over the years.
If you want assistance from floor sanding Melbourne professionals, you can rely on Timber Floor Sanding Melbourne. For years, we have been the leaders in floor sanding and polishing. Reach out to us, and we will bring back that sparkle to your floors!
