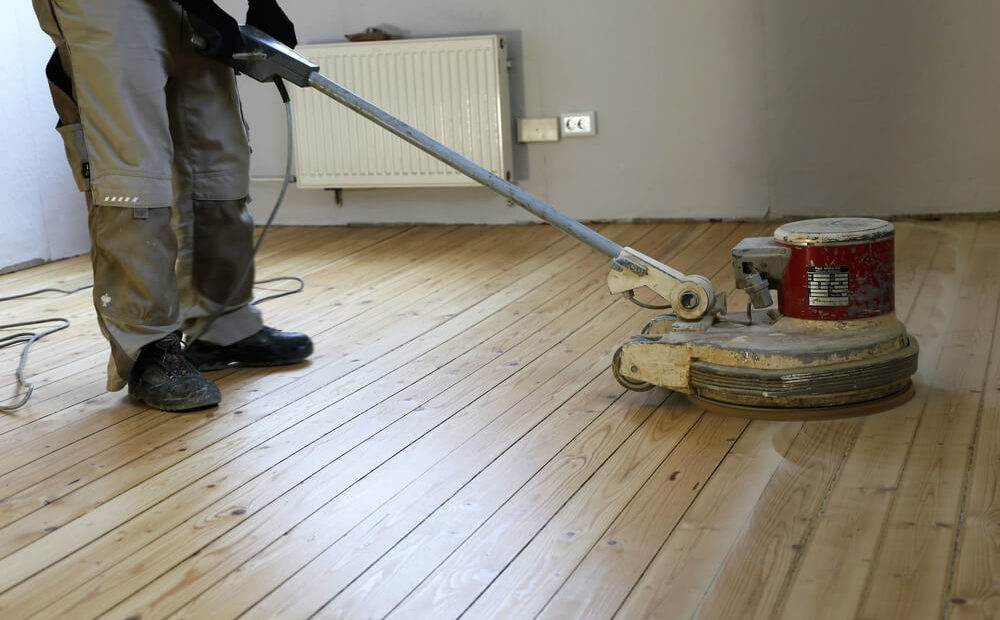
When it comes to home improvement, few projects can make a bigger impact than sanding and refinishing hardwood floors. Whether you’re restoring the lustre of an old home or giving your space a fresh look, the floor sanding Melbourne process is a crucial step in the process. But don’t fret; with the proper guidance and a little elbow grease, you can achieve stunning results.
In this comprehensive guide, we’ll walk you through the ins and outs of sanding hardwood floors like a pro.
So, grab your safety goggles and let’s explore floor sanding tips.
1. Decide Whether You Want to DIY or Hire a Contractor
Before diving into the world of floor sanding, it’s crucial to decide whether you want to tackle this project yourself or hire a contractor. DIY can save you money, but it requires time, effort, and the right tools. Hiring a professional ensures a flawless finish but comes at a higher cost with great results. Consider skills, budget, and the scope of the project before making a decision.
2. Properly Prep the Floor and Surrounding Areas
Preparation is the key to a successful floor sanding Melbourne project. Start by removing all furniture and obstructions from the room. Ensure the floor is clean and free of debris. Fill any gaps or holes with wood filler, and check for protruding nails or staples. This meticulous preparation sets the stage for a smooth process.
3. Repair Any Major Damage First
Inspect your hardwood floor for any significant damage, such as deep scratches, gouges, or warped boards. Address these issues before sanding and polishing hardwood floors to achieve a uniform finish. Replace or repair damaged boards, and ensure the floor is level and stable. This step is crucial for achieving the best results.

4. Don’t Skip the Safety Equipment
Safety should always be a top priority when sanding hardwood floors. Invest in quality safety gear, including goggles, ear protection, a dust mask, and knee pads. Additionally, make sure your sanding machine has proper dust collection capabilities to minimise airborne particles and protect your health.
5. Remove Every Speck of Dust
Dustless sanding is not only a convenience but also a necessity for a professional-looking finish. Modern sanding equipment often includes effective dust collection systems, but it’s essential to ensure they are functioning correctly. Regularly clean the sanding area and use a vacuum with a HEPA filter to capture fine dust particles.
6. Determine What Type of Finish You Want
The type of finish you choose can significantly impact the final appearance of your hardwood floors. Consider options like oil-based polyurethane for a durable, glossy finish, or water-based finishes for a more environmentally friendly option with less odour. Each finish has its pros and cons, so research and select the one that best suits your needs and preferences.
7. Give Your Flooring Time to Cure
After the sanding and finishing process is complete, it’s crucial to allow your hardwood floors ample time to cure. Follow the manufacturer’s guidelines for the best floor sanding, drying and curing times, and avoid heavy foot traffic or placing furniture on the floors until they are fully healed. This patience will ensure your newly refinished floors maintain their beauty for years to come.
In conclusion, mastering the art of sanding hardwood floors is crucial for achieving a beautiful and durable finish. With the help of our floor sanding tips, you can confidently tackle the floor sanding Melbourne project. Remember to prioritise safety, choose the correct sandpaper grit, maintain a consistent sanding pattern, and pay attention to details.
For professional-grade results, trust the floor sanding experts at Timber Floor Sanding Melbourne. We have the skills and equipment to transform your hardwood floors into stunning works of art.
So, what are you waiting for? Get a floor sanding quote from our experts today and enjoy your revitalised hardwood floors!
