Ever wonder how those beautiful hardwood floors get that smooth, glossy finish? There’s an art to floor sanding & polishing Melbourne that can transform rough, worn floors into stunning showpieces. The techniques may seem complicated, but with some patience and the right tools, you can achieve professional results and have floors you’ll be proud to show off.
In this article, we’ll walk you through the basic steps of floor sanding and finishing so you can tackle this DIY project yourself. From sanding out damage and imperfections to applying sealers and polyurethane for protection, you’ll learn tips and tricks to get your floors polished to perfection.
Hardwood floors add warmth and character to a home, so bring out their natural beauty and make them shine with a custom finish. Ready to make your floors the star of the show? Let’s get started.
Preparing Your Floors for Sanding
The key to a smooth sanding and finishing process is preparing your floors properly.
First, ensure the area is clear of any furniture, baseboards, trim, or anything else that can get in the way. Remove outlet covers and vent covers as well. You want a clean, empty canvas to work with.
Next, vacuum and mop the floor thoroughly to remove dirt or debris. Scrub any problem areas to remove stuck-on messes. You don’t want anything interfering with the sanding pads or sandpaper.
Inspect the floor for any nails, staples or other sharp objects and remove them. Check along the edges and in corners carefully. Hammer down or remove any protruding nails. Fill in any holes, cracks or gaps with a wood filler that matches your flooring type. Let it dry completely.
If your floors have an existing finish, you’ll need to rough sand first to provide a “tooth” for the new finish to adhere to. Use coarser 80 to 100-grit sandpaper and a sanding block or pole sander. Vacuum away dust with a brush attachment frequently.
For stubborn stains, you may need to spot sand and treat the area before finishing the entire floor. Once prepped, your floor will be ready for sanding with progressively finer grits and applying your chosen finish. With the proper preparation, you’ll achieve smooth, professional-looking results.
Choosing the Right Sanding Equipment and Sandpaper Grit
So you’ve decided to tackle sanding and refinishing your hardwood floors yourself. Great! The results can be very rewarding. But before you start, you’ll need to choose the right equipment and abrasives for the job.
For large floor areas, rent an orbital floor sander or drum sander. An orbital sander is versatile and easy to use, even for DIYers. A drum sander covers more area but can be trickier to maneuver. For edges and corners, use an edge sander. And for spot sanding, a detail or palm sander will do.
Next, select your sandpaper grits. Start with a coarser grit, like 40 to 60 for rough sanding, then progressively finer grits – 80, 120, 150. The higher the grit number, the smoother the finish. For most floors, you’ll want to end with at least 150 grit. For intricate floors or a glass-smooth finish, go up to 220 grit or higher.
- 40-60 grit: For rough sanding and stripping the old finish. Aggressively removes material.
- 80-120 grit: For intermediate sanding. Smooths surfaces and scratch from coarser grits.
- 150+ grit: For final sanding before staining or sealing. Provides a smooth, polished surface ready for finishing.
Take your time and be methodical. Clean the floor thoroughly between grits to remove dust. And don’t skip grits – this will ensure an even, professional-looking finish. With the proper equipment and abrasives, you’ll have your floors polished to perfection in no time!
Sanding Wood Floors: Technique and Process
Sanding wood floors requires time and patience, but with the right technique and process, you’ll achieve a smooth finish.
Before sanding, thoroughly clean the floor to remove any dirt or debris. Vacuum and sweep, then wipe the floor with a tack cloth to pick up any remaining dust.
Coarse Sanding
Start with coarse, open-grit sandpaper, around 40 to 60 grit. Attach the sandpaper to a floor sander or sanding block and sand with the grain using overlapping passes. Work slowly and methodically, checking your progress frequently.
The coarse sanding will remove scratches, stains, and uneven areas.
Once the floor is uniformly dull, vacuum and wipe away dust again. Move on to progressively finer grits, vacuuming and wiping between each change. For most floors, you’ll want to work your way to at least 150 grit for a smooth finish.

Finer Sanding
As the grit gets finer, sand in the direction of the grain using lighter pressure and smaller sanding blocks or pads. The finer the grit, the less it will remove, so take your time. For the final sanding, consider using a sanding sealer or conditioner, which helps the wood absorb the finish more evenly.
Final Touches
After the finest sanding, vacuum and tack cloth the floor again to remove every spec of dust before applying your chosen finish. For the best results, consider renting a buffing or polishing machine to refine and smooth the floor. Wipe away any remaining dust, and your floor will be polished to perfection, ready for its final finish.
Following proper sanding technique and working through the grits with care will result in a glassy smooth floor ready for a perfect finish. Take your time—patience and precision pay off!
Applying the Finish: Polyurethane, Lacquer or Oil-Based?
When it comes time to apply a finish to your newly sanded floors, you have three main options: polyurethane, lacquer or oil-based finish. Each has pros and cons, so consider the look you want and how much protection you need.
Polyurethane is a popular choice for wood floors. It provides a durable, protective coating that can handle lots of foot traffic. Polyurethane comes in a range of sheens, from matte to high gloss. It may turn yellow over time, so choose a water-based polyurethane for a crystal-clear finish. Water-based poly also has less odour and dries faster than oil-based polyurethane.
Lacquer is another very durable finish, but it has a strong odour and takes longer to dry. Lacquer creates an ultra-smooth, plastic-like coating. It comes in a range of sheens and won’t yellow like polyurethane. However, lacquer can be difficult to touch up without showing lap marks.
Oil-based finishes, like tung or linseed oil, penetrate the wood to protect it while still showing the natural grain. They have a warm amber tone and satin sheen. Oil finishes are easy to apply but take days to dry and cure. They require frequent reapplication to maintain protection. Oils may darken some wood types like pine or maple.
For most DIYers, water-based polyurethane is a great choice. It’s easy to apply, dries quickly, and provides excellent protection for wood floors. Choose a mid-range sheen-like satin, which has a slightly glossy finish but still hides imperfections well. Apply 2-3 coats, waiting 2-3 hours between coats. Your newly refinished floor will look polished to perfection in no time!

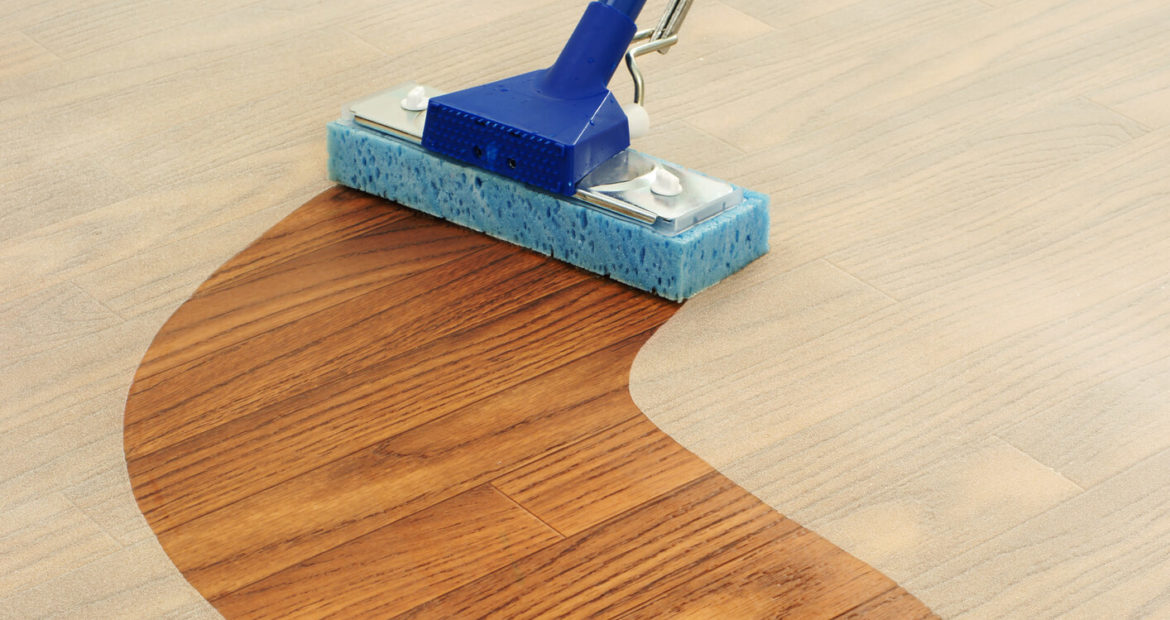
Protecting Your Floors After Polishing
Once your floors have been sanded and polished to perfection, it’s important to protect them. After all your hard work, you want those smooth and shiny floors to last! Here are some tips to keep your floors looking pristine.
Use Felt Pads
Attach felt pads, sliders or gliders to the bottom of furniture, chair legs, and any other items that contact the floor. This prevents scratches and dents by minimizing direct contact and friction. Felt pads are inexpensive and can be found at most hardware stores.
Place Mats or Rugs
Strategically place mats, rugs or runners in high-traffic areas and entryways. This helps prevent grit, dirt and debris from scratching or dulling the finish. Shake out or vacuum mats and rugs regularly to keep them clean.
Sweep and Vacuum Frequently
Daily sweeping, vacuuming or dusting is ideal. This simple step removes abrasive particles from the floor that can mar the surface over time with foot traffic and movement. Pay extra attention to entryways where dirt and grit tend to accumulate.
Clean Spills Immediately
Wipe up spills, splatters and spots immediately to avoid water damage or stains. Use a damp cloth or sponge and a hardwood floor cleaner or a mixture of vinegar and water. Blot with a dry cloth to soak up excess moisture.
Recoat or Refresh
For the highest protection, consider recoating your floors every few years or when you notice the finish becoming dull or worn. A fresh coat of polyurethane or lacquer helps seal and protect the floors from damage. For a quick refresh in between recoats, use a hardwood floor polish or refresher product.
By taking these protective measures regularly, your hard work sanding and finishing those beautiful floors will be well worth it for years to come. Keeping floors in pristine condition requires ongoing maintenance, but with a little care and effort, you’ll have floors to be proud of.
So there you have it, everything you need to know to transform your floors into a smooth and glossy masterpiece. With the right tools, techniques, and a little elbow grease, you’ll be well on your way to perfectly polished floors to be proud of. Once you’ve experienced the satisfaction of reviving worn and weary wood floors, you’ll never want to pay someone else to do it again.
Get ready to roll up your sleeves, turn on some tunes, and enjoy a rewarding DIY project making your home more beautiful one square foot at a time. Your sore muscles will heal, but your gorgeous new floors will last years. So go on, you’ve got this! Get started with floor sanding & polishing Melbourne, and don’t stop until you can see your smiling face reflected in that shiny new polyurethane. You and your home deserve floors this fantastic. So choose the company wisely. Elevate your floors with Timber Floor Sanding Melbourne’s expert sanding services, revealing the timeless beauty of your timber floors. Experience the difference of a professionally restored floor today!
