So, your floating floor is looking a little worse for wear these days, huh? Don’t worry, it happens to the best of us. Those scratches, dents, and water damage can really take a toll.
But before you go ripping it out and dropping thousands on a replacement, there’s an easy fix you should try first – professional floor sanding Melbourne service and refinishing.
Floor sanding is a simple process where specialised machines are used to sand down and re-stain your existing flooring, restoring it to like-new condition. The results can be truly stunning. Best of all, it’s way more affordable than replacing the floor outright.
In this article, we’ll walk you through exactly how professional floor sanding works, what’s involved in sanding floating floorboards how much it costs, and how reputable contractors handle it.
Ready to learn how to make your floors shine like new for a fraction of the cost? Let’s dive in!
What is Floating Floorboards?
A floating floor is a floor that isn’t nailed or glued to the subfloor below it. Instead, the planks or tiles are connected to each other and then laid over the subfloor. This allows the flooring to expand and contract freely with temperature and humidity changes.
The most common types of floating floorboards are laminate and luxury vinyl planks or tiles. These provide the look of wood or stone at a lower cost. And if your floor ever gets damaged, individual planks or tiles can easily be replaced.
Floating floors offer lots of benefits and style options without the permanence of glued-down flooring. For many homeowners and renters, they’re an ideal, budget-friendly flooring solution.
Can You Sand Floating Floorboards? Understanding Floating Floorboards
When it comes to sanding floating floorboards, the short answer is yes, you can sand them. However, there are a few things to keep in mind.
Floating floors, or “click-together” floorboards, are designed to lock together without being nailed or glued to the subfloor. Gap filling
To sand floating floors, you’ll first need to fill in any gaps between planks with wood filler to provide an even surface. Let the filler dry completely.
Start with coarser grit
Begin sanding with a coarser 80 to 120-grit sandpaper to level the floor. Work slowly using an orbital sander, sanding in the direction of the grain. Vacuum away dust and check your progress. Move to progressively finer grits, up to 220.
Be careful at the edges
Take extra care when sanding near the edges and seams of planks. Don’t sand too aggressively, which could damage the connecting grooves. Lightly sand just enough to rough up the surface for the new finish to adhere properly.
Re-seal the floor
Once sanded, you’ll need to re-seal the floor to protect the wood. Apply 2-3 coats of polyurethane or floor lacquer, waiting 2-3 hours between coats. This re-seals the floor and helps bond the planks together again.
With some patience and the proper techniques, sanding and refinishing floating floors is definitely doable for a DIYer. Take your time and be careful around edges and seams, and you’ll have your floors looking brand new again in no time.
Preparing for Professional Floor Sanding
To prepare for professional floor sanding Melbourne service, you’ll need to do some work ahead of time to ensure the best results.
Clear the Room
Remove all furniture, decor, and breakables from the room. Clearing the space gives the floor sanding crew full access to the floors and prevents damage to your belongings from the dust created during sanding.
Once the room is empty, do a final sweep to pick up any debris. Loose items like nails, staples or splinters can damage the sanding equipment and scratch the floors. Double-check corners, trim work, and hard-to-reach areas.
Seal Doorways
Use painter’s tape, plastic sheeting, or drop cloths to seal doorways, vents, cabinets and any exposed woodwork in the room. This prevents the fine dust from sanding from spreading into other areas of your home. Be sure to also seal any air vents or returns in the room for the best containment.
Protect Walls
Place drop cloths, plastic sheeting or rosin paper along the baseboards and a few feet up the walls. Although the floor sanding crew works carefully, the high-powered equipment and fine dust can sometimes spray up onto walls. Protecting walls prevents damage and extra cleanup.
Once prepped, your space will be ready for the floor sanding professionals to work their magic. Their high-powered sanding equipment, dust extraction systems and expert skills will have your floors smooth and ready for the new finish in no time. A little advance preparation will ensure the best results from your professional floor sanding.

Professional Floor Sanding Process
Professional floor sanding is a multi-step process to fix and restore your floating floor.
Step 1: Floor Assessment
A professional flooring contractor will first inspect your floor to assess the current condition and determine the best method for fixing and restoring it. They check for water damage, deep scratches, warped or loose boards, and the overall level of the floor. Based on their assessment, they will recommend either re-floating, sanding and refinishing, or replacing damaged boards.
Step 2: Floor Preparation
To prepare for sanding, the flooring pro will remove baseboards and transition pieces, then thoroughly clean the floor to remove built-up dirt and debris. They may need to grind high spots or fill in low spots to level the floor before sanding.
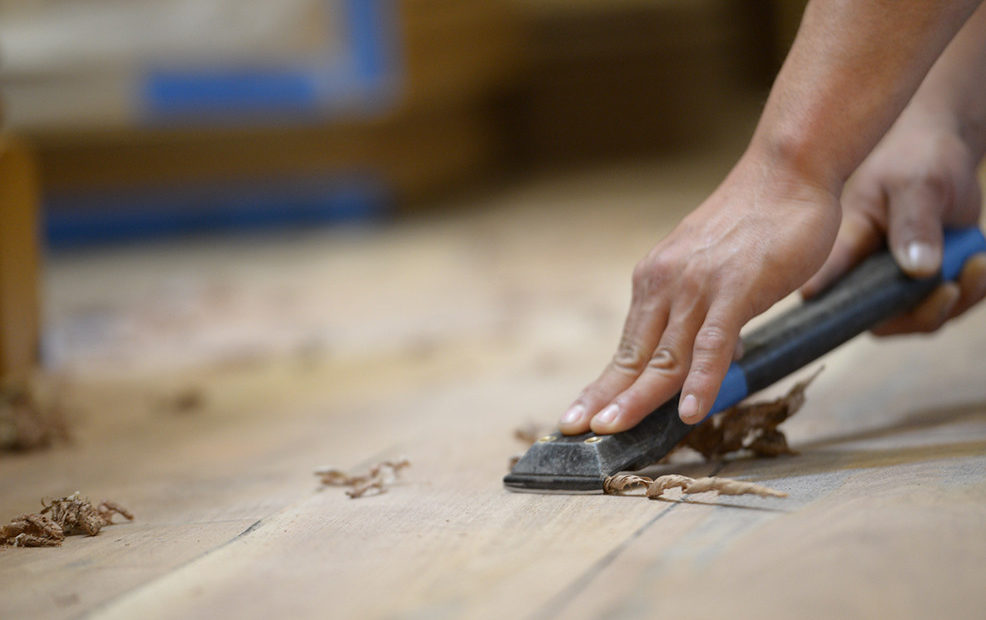
Step 3: Sanding
The floor sanding equipment uses progressively finer grits of sandpaper, starting with coarser grits to shape the floor and then moving to very fine grits for a smooth finish. The pro sands in the direction of the flooring boards using powerful sanding machines. They vacuum thoroughly between grit changes to remove dust.
Step 4: Finishing
With the floor smooth and level, the final step is applying two to three coats of polyurethane or acrylic finish. Oil-based finishes provide the most durability but take longer to dry. Water-based finishes have less odour and dry faster. The pro buffs lightly between coats, and the final coat leaves your floor with a durable, attractive shine.
Following a professional sanding and refinishing process will restore a smooth, level surface and protective finish to your floating floor. Your flooring investment will look as good as new!
Types of Sanding Equipment Used for Floating Floors by Professionals
Professional floor sanding Melbourne contractors use heavy-duty sanding equipment to efficiently sand and refinish floating floors. The main types of sanders used are:
- Drum sanders – These are large sanding machines with rotating sanding drums that quickly sand the main floor area. They come in different grits for the initial heavy sanding and final fine sanding.
- Edging or detail sanders – These are used along the edges and corners of the floor that the drum sander can’t reach. They also come in different grits to blend the edges in with the main floor.
- Orbital or palm sanders – For very tight areas, corners and edges, orbital or palm sanders are used. They are handheld and can manoeuvre into small spaces. They require detailed sanding pads in fine grits.
- Buffing pads – After the final sanding, buffing pads are used to apply the floor sealant and provide a smooth finish. Wool buffing pads are commonly used.
Using the proper professional equipment and techniques, an experienced floor sanding Melbourne contractor can quickly sand down and refinish a floating floor. Be sure to hire a reputable pro for the best results.
Surface Preparation for Finishing
To properly finish a floating floor, you’ll need to prepare the surface. This means inspecting for any dents, scratches or imperfections and sanding the floor smooth.
Check over the floorboards and use wood filler or floor patch compound to fill in any gaps between boards or imperfections in the wood. Let the filler dry completely.
For larger scratches or dents, you may need to do some localised sanding. Use progressively finer sandpaper, starting with coarser 100-150 grit and working your way to 220.
Gently sand in the direction of the grain using small circular motions. Vacuum and wipe the area when done to remove debris.
Any rough or splintery areas can be lightly sanded and smooth. Pay extra attention to the edges and seams where boards meet.
Once the entire floor has been sanded, vacuum and wipe thoroughly with a tack cloth to pick up all remaining dust. Your floor is now ready for staining and sealing.
Proper surface preparation is key to achieving professional-looking results when refinishing flooring yourself. Take your time, and don’t skip any steps. Your patience and diligence will pay off with a smooth, blemish-free floor surface ready to accept a durable protective finish.
Final Inspection and Quality Control
With the flooring installation complete, it’s time for a final inspection to ensure quality and address any issues before the job is finished. As a professional flooring contractor, your reputation depends on providing high-quality work that leaves customers satisfied.
Walk over the entire floor, looking for any imperfections in the flooring like chips, dents, scratches or gaps. Check that all floorboards are securely locked together with no uneven edges. Inspect the trim and moulding for proper installation with no visible nail holes or splinters.
Test that all appliances like dishwashers, refrigerators and stoves can move freely over the new flooring. Make sure doors are still open and close properly without catching on the floor. Check that floor vents, radiators and baseboards do not obstruct the flooring.
Once you’ve inspected the flooring installation, do a final cleaning to remove any dirt or debris. Mop vinyl or linoleum floors. Vacuum and sweep wood or laminate floors. Consider offering customers recommendations for proper floor care to keep their new flooring looking its best.
Before leaving the job, walk through the completed work with the customer to address any final questions or concerns.
Estimating the Cost of Sand Floating Floorboards Professionally
Getting a professional to sand and refinish your floating floorboards cost can depend on factors like the condition of your flooring, the number of coats needed, and your location.
Minor scratches or water damage may only need light sanding and a new topcoat of polyurethane or lacquer. More extensive repairs could require intensive sanding, wood filler for gouges, and multiple coats of finish.
It’s best to get estimates from at least three reputable flooring contractors in your area. Ask if they charge by the square foot or by the hour. Square foot pricing is more common and helps provide a more accurate estimate.
Get a written contract that specifies exactly what is included, the number of coats being applied, the brand of finish used, and the total cost before work begins.
While the upfront sanding floorboards cost may seem high, professionally refinishing your floors can significantly increase the lifespan and improve the appearance of your floating floorboards. With proper care and maintenance, a new finish coat can last 5-10 years before needing another sanding.
DIY refinishing, on the other hand, often doesn’t last as long and may end up costing more in the long run. For the best results, hire an experienced professional floor sander and refinisher.
So, there you have it, with a bit of patience and the right tools, you can fix those damaged floating floorboards and have them look as good as new.
A professional floor sanding Melbourne service is a worthwhile investment if you want to tackle larger flooring projects or have extensive water damage.
Your floating floors will be back to floating, and your living room, hallway or wherever the flooring is will look flawless again.
All it takes is a little staining or painting, resealing and sanding. With some elbow grease, you’ll have your floating floors fixed in no time. Now go forth and make those floors shine!
Remember, for larger projects or when dealing with extensive damage, consider reaching out to the experts at Timber Floor Sanding Melbourne. Our professional floor sanding services can make a world of difference in restoring the beauty and integrity of your floors.
